I love the winter wonderland prints that Sew Much Fabric has in their Round 5 Pre-order. Sew Much Fabric prints on a 95% cotton/5% Spandex 190-200 gsm knit. It feels wonderful. The Winter Wonderland prints are open for pre-orders until August 8th. They are $20/yard during the pre-order.
I sewed up the Penguins - for myself, and I made a childs size 4 top with the Mama Bear, MamaBear Panel, and Ice Crystals.
I decided to use a free pattern that I used recently - the Portia Top from DixieDIY. Get the free pattern here - Portia Top. This time I decided to make it a long sleeve top since it is for winter.
So I placed the top piece with the sleeve on my fabric and cut the sleeve long.
Then I placed the front piece on top of the back sleeve piece and cut it to match the sleeve.
Here it is cut.
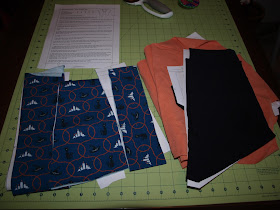
Then I cut out the side pieces from the penguins and the center front and back from a black & white chevron. Here are all my pieces.
The first step is to sew the front shoulder pieces together and sew the sleeves.
Next add the side panels.
Now add the center pieces,
Next, it's time to add a neck band and band to the sleeves.
Now to hem it and be done!
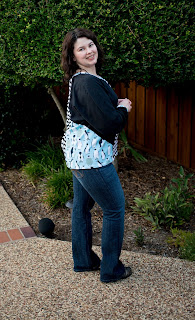
Here I am in my new winter top.
Now onto the kids top. First I added fabric to the top and bottom of the panel. Luckily I had the perfect shade of blue knit in my stash. After adding the fabric, I used my coverstitch to top stitch the seams. Then I added fabric to the sides. Then I cut my shirt front. I used the solid blue for the back. Then I sewed the top and front together at the shoulders.
Next, I added the neck band.
Then I topstitched it down with the coverstitch.
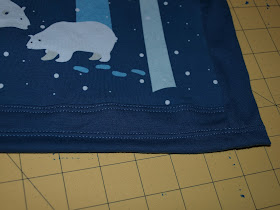
Next it was time to add the sleeves. These polar bears are so cute!
On the shirt.
Then I serged the side seams and the final step was to hem the top.
Finished!
Thanks for looking. Please like my facebook page to get notifications of new blog posts. www.facebook.com/capturecraftcook
Riki Prints - HalloDayGivingMas Strike Offs
Riki Prints is covering all the fall and winter holidays with their current round of custom fabric. They are calling it ...
Here are all my pieces cut out.
Here is a close up of the Cats n' Hats.
Unfortunately I did not take photos as I sewed. I will do another blog post on this pattern in the future. I really like it, but I want to make it a little longer and I think I want to make the sleeves into a long sleeve or maybe 3/4 length dolman. So I will work out my tweaks to the pattern and make it again and go through all the details.
Here I am in my finished shirt.
Next I sewed up Madre Mia. I made this into a top for my 93 year old grandmother. For this one I used a pattern I have had a long time and have been wanting to make for myself. It's a Simplicity threads magazine collection pattern #3625. It is intended for woven fabrics, so I modified it for this knit. The pattern calls for a lot of gathers, I cut my pieces to have some gathers, but kept them minimal.
This print is so vibrant and beautiful.
Here are all my pieces cut out.
I did not get step by step photos for this one either. I plan on making myself a top with this pattern very soon and will do a more detailed post at that time.
Here I am in the top. I plan on making some modifications to it before giving it to my grandmother. My grandmother likes all her tops to be very frilly. She loves lace and trim. So I need to find the perfect trim to put on this before I give it to here. I'm also thinking that I'll add a ribbon tie at the neck. I'll see if I can get her to model it when I give it to her.
Thanks for looking. If you want to be notified of new blog posts, like my Facebook page www.facebook.com/capturecraftcook/
HalloDayGivingMas
You can order Riki Prints custom fabric and buy retail of previous rounds online at www.rikipediawear.com/
I sewed up 2 prints from this round. Cats n' Hats - a whimsical print of black cats, witches hats, and candles to celebrate Halloween and Madre Mia - a religious themed print of the Virgin Mary (Our Lady of Guadalupe) in honor of Dia de la Virgen de Guadalupe on December 12th.
First - I started off with Cats n' Hats. For this print, I decided to use a free pattern I found online. It is from dixiediy.com/. The pattern is the Portia Top and can be found here - portia-top.pdf. This is a pdf pattern, but there are not a ton of pages. The pattern is for sizes XS to XL.
Here are all my pieces cut out.
Here is a close up of the Cats n' Hats.
Unfortunately I did not take photos as I sewed. I will do another blog post on this pattern in the future. I really like it, but I want to make it a little longer and I think I want to make the sleeves into a long sleeve or maybe 3/4 length dolman. So I will work out my tweaks to the pattern and make it again and go through all the details.
Here I am in my finished shirt.
Next I sewed up Madre Mia. I made this into a top for my 93 year old grandmother. For this one I used a pattern I have had a long time and have been wanting to make for myself. It's a Simplicity threads magazine collection pattern #3625. It is intended for woven fabrics, so I modified it for this knit. The pattern calls for a lot of gathers, I cut my pieces to have some gathers, but kept them minimal.
This print is so vibrant and beautiful.
Here are all my pieces cut out.
I did not get step by step photos for this one either. I plan on making myself a top with this pattern very soon and will do a more detailed post at that time.
Here I am in the top. I plan on making some modifications to it before giving it to my grandmother. My grandmother likes all her tops to be very frilly. She loves lace and trim. So I need to find the perfect trim to put on this before I give it to here. I'm also thinking that I'll add a ribbon tie at the neck. I'll see if I can get her to model it when I give it to her.
Thanks for looking. If you want to be notified of new blog posts, like my Facebook page www.facebook.com/capturecraftcook/
Sew Much Fabric - Halloween Strike Offs
I received 2 strike offs from Sew Much Fabric for their Halloween Round. To order these prints, join the group on Facebook at facebook.com/groups/sewmuchfabric/
Sew Much Fabric prints on 95% Cotton 5% Spandex Knit. The pre-order price is $20/yard.
I received a child size panel of the Wolf Man. I used Butterick Pattern 5286 as my template for making a boys top.
The panel was a little smaller than what I needed so I added the fabric that I was using as a coordinate to the top and bottom of the panel. My coordinate is a black & yellow striped knit I purchased from Fabric Stache (fabricstacheshop.com/). This was sold as flawed yardage, but I saw very few flaws.
The front panel was not wide enough either for the boys size small I was making. Instead of adding the stripes to the sides, I just cut the back piece with about 3 inches of the front piece added to the sides. That made the back piece wrap around to the front.
This is a very easy sew and I was done in no time. Unfortunately, I either didn't take pictures of the process or I can't remember where they are.
Here are finished photos.
Next I sewed up the Classic Monsters strike off.
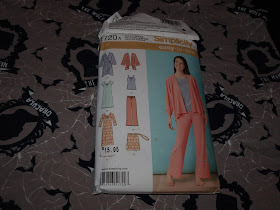
For this one, I went with one of my favorite patterns - Simplicity 1720A.
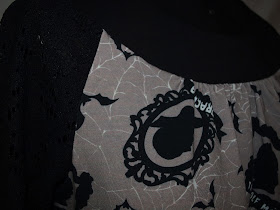
I decided to pair the print with solid black and to do the sleeves in black lace. Here are all my pieces.
I sewed the front and back together at the sides. Then I sewed my gathering stitches on the front and back.
Next I sewed the arms. Doing the dart was tricky. It was hard to see my marks on the black lace. I know they are not perfect, but they will do the trick.
I then wanted to serge the sides of the sleeves. Since this is lace and sergers have a lot of little moving parts, I placed a strip of tearaway stabilizer under the lace before serging to make sure nothing got snagged. You can still see the interfacing in the seam, but after I was it, most of it should come out.
Then I serged the sleeves onto the body. I kept the fabric on the bottom and the lace on top when serging the rest. I only had to use the stabilizer when serging 2 layers of lace.
Then I made the yoke.
Now to sew the yoke to the body.
Here's the neckline.
And here I am in my Classic Monsters top.
If you enjoy my blog, like my Facebook page at www.facebook.com/capturecraftcook and get notifications for any new blog posts.
Thanks!


