Troubled Tunic
Today I decided to work on a UFO - Unfinshed Object. I found it recently while going through a bin in my sewing room. It was a top I had cut out, but hadn't done anything else.
The pattern was Simplicity 2696 and I had all the pieces for view A except for the sleeve cuffs. Which, I probably had decided I didn't want anyway.
So I started with the first step in the pattern instructions - stay stitching the front and back necklines and gathering.
Then I sewed the front and back together at the shoulders and sides.
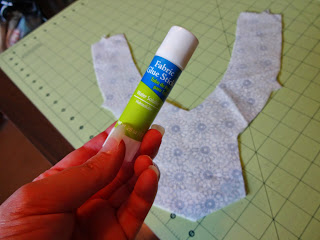
Next it was time to do the bodice. This is where I stray from the instructions. I like as few steps as possible, so I like to sew my bodice as one piece - then attach it to the top. The pattern pieces said to cut 2 of fabric and 1 of interfacing. The pattern instructions said fusible interfacing. Since I didn't think I had anymore of this fabric, I decided to pull out my handy dandy fabric glue.
I love this stuff. It's great when sewing stuff that doesn't pin well. You just glue it together then sew it It's water soluble, so it washes away.
So I laid my pieces out and added the fabric glue to small sections as I went. I let the pieces dry for a few minutes, then sewed the front and back pieces together.
Then I pinned them right sides together and sewed them. I drew the marks for the v-notch on the neck.
After they were sewn, I had to turn them right sides out and iron them. My sewing room occupies a bedroom in my home, but is still a little cramped. I do my ironing on my main table that is in the middle of the room on an ironing mat that I made.
So here is the bodice piece ironed. Which this fabric did not like being ironed. It changed color. Now sometimes, I know the inks in the fabric will react to the heat and change color, then return to normal when they cool down. This did not. And the color change was very uneven. This section turned very yellow, while the other side seemed to fade.
Next, I pinned the bodice to the shirt.
I then sewed it, then serged over it. Here it is attached. Notice the bodice is slightly discolored.
Next it was time to get the sleeves done. First I sewed the gathers at the top. Then serged the sides.
Then I pinned the sleeves to the top. And I sewed them, then serged.
I tried it on, and it was hanging off my shoulders and was too roomy across my bust. What size was this?
This is an easy fix, and one I've done on store bought tops before. I took out the pattern for the front and laid it on top of the top when I had it laid out nice and flat. I knew I needed to take at least an inch off the body of the top from the shoulders down to the waist.
I cut along the new armhole, and tapered down from there to the waist. Then I cut the excess fabric off of the sleeve leaving the serged seam on the sleeve. Then I sewed the sides of the top and pinned the sleeves on. Then I serged the sleeves onto the top cutting off the old serged seam as I did so.
Now it fit great - or did it?
Afterwards, I looked at the pattern envelope. I had cut a size 14. Which the measurement for were Bust - 36", Waist - 28", and Hips - 38". Those measurements are very close to my actual measurements. It should have fit.
Then I looked at the cover. The shoulder seams were supposed to hang off of my shoulder!
Oh well - I didn't like the way it felt that way. In the end, I'm the one wearing it and I wanted it to be comfortable. Now it is.


No comments:
Post a Comment