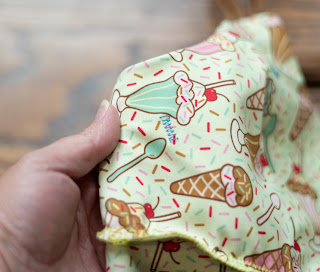
Last week I showed you my Ice Cream Workout attire that I made using Greenstyle Patterns and Zenith & Quasar Fabric. Today, I want to go a little more in depth into the Power Sports Bra. I've been getting a lot of comments on Facebook and Instagram about things like sizing, sewing in foam cups, and about what the inside looks like.
First off sizing - The pattern has instructions to take your under bust measurement and your full bust measurements. You then subtract your under bust from your full bust to get your cup size. This method works for most people, but not for me. I must have an odd build because I have a 6" difference which according to the pattern would mean I need an F cup and a 32 band. I typically buy 34 B or 34 C bras in the store. The first Power Sports Bra that I made was a 32 band with B cups, it was on the small side and I knew that this time, I needed to go with the C cups. The fit this time is perfect.
The past few weeks I have made several bras and bralettes and I have had to try more than one size for many. Or made one that was wearable, but knew what to change for the next. I'm glad I now know what fits me perfectly in the Power Sports Bra so I can make many more. The Power Sports Bra has many options and one thing I did differently was the straps. The pattern has instructions to make straps using fabric and elastic. I opted to use some latex free foldover elastic (foe) that I had. I just zig-zag stitched the foe in half and cut the piece to the length specific for the straps. I might use bra strapping for my next one.
The Power Sports Bra has several back options. This is the strappy u-back. There is also a strappy cross back, a racer back (with an optional pocket), and racer back with an optional key hole. You can make it as plain or fancy as you want. There are also a number of power sports bra hacks with lots of fancy strap configurations. Since I'm not the sort of person to walk around in public in just my sports bra and leggings, I tend to keep it simple. The Power Sports Bra is to be finished with an elastic band under the bust, but I am highly allergic to latex and have a very hard time finding wide latex free elastic - especially in fun colors. So I opted to finish mine with a knit band. I cut my band at 80% of my underbust measurement and at 5" tall to make it close to 2" finished.
Here is the inside of my Power Sports Bra. The bra is fully lined. You can line with powernet for extra support. I used the same fabric for the outside and inside - yoga swim spandex. Technically I could use this for swimming. Many patterns have instructions for the addition of foam cups. The Power Sports Bra instructions are not very detailed when it comes to this step. After I construct the lining, I go ahead and sew my cups in place. You can use premade cups or make your own from bra foam. Buying premade is much easier. I made my own for this project, and do not have a photo of them. Most foam cups come shaped as a rectangle or a triangle. When I sew the cups in, I just tack them into place at the corners. I lay my lining wrong side up and place the foam cups so that the cups are like domes on the fabric. I place each cup centered on each side. I press them down, flattening them with one hand while I pin them in place with the other. I then sew them in place with my sewing machine using a zig zag stitch.
Here's a closer look at the stitches. Normally I'd use thread that matches better, but I'll admit that I was lazy. Which worked out great for these photos. As you can see, it doesn't take many stitches. Do you have to sew them in place? No - but if you don't they will shift around when you wash them, and possibly when you wear them. I prefer to take the time to sew them in place and avoid the frustration later of trying to get them to lay the right way after every washing. Trust me - it's so worth it!
If you are ready to sew your own Power Sports Bra, there is a video sew along at at https://www.sewingwithsarah.com/sewalong/power-bra-sewalong-day-1/


No comments:
Post a Comment