Showing posts with label Yoga. Show all posts

Greenstyle Creations Warrior Pants

I always enjoy testing for Greenstyle Creations. I wish I worked out more to justify buying and sewing all of their amazing activewear patterns. I really enjoy sewing and testing the more athleisure patterns, as those fit into my lifestyle so much better. The newest pattern is the Warrior Pants.


It's hard for me to believe it, but I moved to Plano nine years ago from my hometown. It's so hard to build a new network of friends and get into a new routine. For me that meant I needed to find a new workout routine that was gentle on my body as I was diagnosed with Rheumatoid Arthritis after moving.


That's when I discovered yoga. The Warrior Pants are named after the warrior pose in yoga. When I think of the warrior pose, I think about doing Sun Salutations. Moving through a series of poses all while slowly breathing in and out. Like life - sometimes you just go through the motions of day to day life.


I haven't been to a traditional yoga class in probably 2 years, but still practice at home. The Warrior Pants are not something I could see myself wearing to a yoga class though. I tend to prefer leggings and tanks. I wore wide legged pants once and I kept catching my foot in all that extra fabric hanging between my legs and nearly fell over - several times.


The Warrior Pants to me are the perfect warm weather athleisure pants. You look like you might work out, but you might just sit on the sofa all day. The pockets have a very unique construction that results in the front leg overlapping the back when you make the pockets.


You sew up the side seam as you desire. While you could sew them completely closed, that would be kinda boring. I don't care to show too much leg, as my legs are not very pretty. I sewed mine down the sides to my knee.


I made this pair of Warrior Pants with rayon spandex from the fabric district. You can find amazing remnants for $2.50 a yard at the fabric district - but you have to take the entire remnant. That's usually not too bad, but some of their remnants can be an entire bolt! I got this fabric from Sharon (Sweet Mama Life - check out her Warrior Pants blog post). She and I often swap fabric leftovers. She gave me this fabric after she had already made something from it.


I also made the Warrior Pants in cotton lycra.


These are so comfortable!


While I may never wear my Warrior Pants to a yoga class, I'll definitely wear them all over town.


As we get further into fall and our nice warm days slowly disappear, I'll be looking forward to next spring to get out my Warrior Pants and even make a few new pairs.


The Warrior Pants are definitely not for a beginner sewist. The unique construction of the pockets could be challenging for a beginner. In addition, these require a lot of topstitching - often with slinky fabrics. While I did make a pair with cotton lycra - the Warrior Pants look best in a drapey lightweight knit. The first pair in my blog is an ITY knit. The ITY and Rayon Spandex are ideal fabrics for the Warrior Pants, but both can be extremely shifty. So be prepared to use lots of pins and patience, but the end result is worth all that extra effort.

The Warrior Pants are on sale for $9 through Thursday, October 25th.

Follow me on Instagram and Facebook!

Disclosure: This post may contain affiliate links. These links provide me with a small compensation if you make a purchase using my link. There is not cost to you when you do this. My thoughts and opinions given in this blog post are mine.

5 out of 4 - Agility Tank

The Agility tank from 5 out of 4 Patterns is very versatile. It can be a swim top, workout top, or a casual dress even. It also is a lot easier to make than it looks.

First you sew the front and back (racer back portion) of the sports bra together at the shoulder seams.


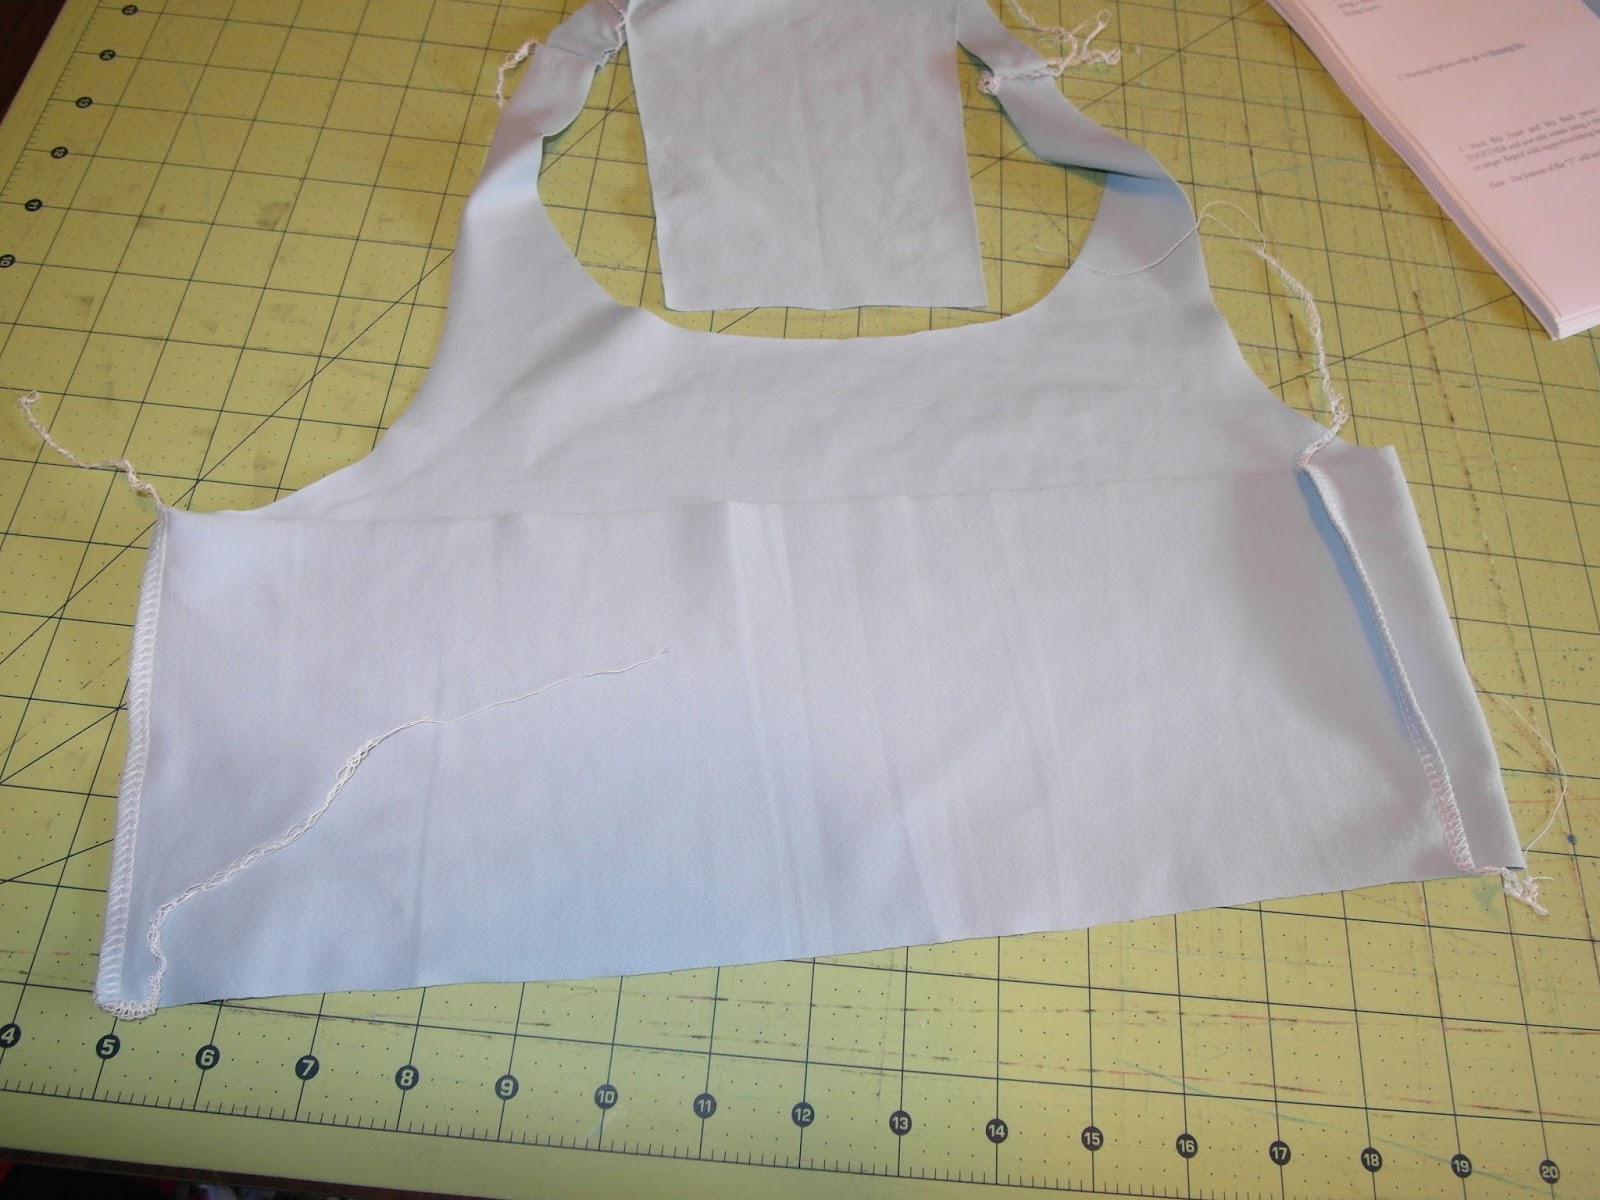
Now sew the bottom half of the back of the sports bra to the front at the side seams.


Mark the lines on the back overlay piece for the pleat.


With right sides together sew along the line shown above. Then spread the fabric out and baste across the top to make the pleat.


Sew the front and back overlay pieces together at the side seams.


Now hem the under arm portion of the overlay.


Now sew 2 lines using a long stitch length across the top of the front overlay. Pull the bobbin strings to gather the front overlay.


Spread the gathered overlay evenly across the front of the sports bra. The pattern piece has marks to show where the overlay goes, but you could make the gathered portion more narrow or wider to suit your tastes. Baste the front overlay in place.


Now baste the back overly piece to the back of the sports bra lower half. The pleat will go in the very middle of the back.


Now add the binding to the neckline of the sports bra. First it is sewn onto the front as shown.


Then the binding is folded down. This can be a little tricky - I just use a ton of wonder clips as I go along. I then topstitch the binding on my coverstitch.


Now to add the binding from the bottom of the racer backside along the front of the sports bra around the lower back of the sports bra, back up around to end at the other side of the racer back.


Sew it on slowly making sure you stretch it as you go.


Then you fold and topstitch it - just like the neckline.


Now try it on and see where the racerback needs to attach to the lower back of the sports bra and also to see if you need to remove any length from the sports bra before you attach elastic or a band. Then sew it down together. I sewed it right under the binding, but I found this made the binding want to flip down when I wear it. So definitely sew it across the binding to prevent that. Now add elastic - or in my case, I just added a wide band to the bottom.


Here I am in my Agility Tank with a banded bottom and matching leggings. I used baby blue Supplex from Zenith & Quasar. This color is no longer in stock, but they have many other beautiful colors. Supplex is my go-to for any active wear. It's what is used by high end athletic wear companies.


I love the race back fit. The overlay on this is a cotton lycra from Smoogie Fabric. The design is Three Stars and is out of stock in cotton lycra, but is available in Minky and in the very popular Stained Glass Lace version (which is the print I used, but it also has a black lace print over the design).


The overlay has different armhole cut lines for different looks. You can have a lower one to show more skin - this is great for making the swimwear version. I did the higher cut line.


I also made another version with a longer overlay - but not quite the dress length - to get a tunic perfect for the hot Texas summer.


On this one, I also sized up on the overlay to make it looser. But in doing so - the armholes ended up lower than I cared for. Next time, I'll have to make sure I cut the armhole higher than the pattern piece.


If you enjoyed my blog, please follow me on Facebook at www.facebook.com/capturecraftcook and on Instagram at www.instagram.com/weemia

Thanks!