Buy the Haute Skinny Pants on Etsy for 25% off through August 25 with the coupon code "skinnypants".
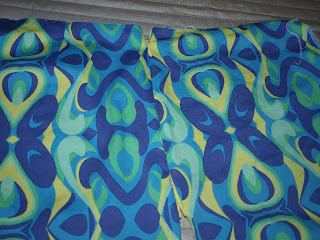
I looked through my stretch wovens and decided to use some psychedelic print I bought at Golden D'or during one of their 99 cent inventory sales.
Here are my legs cut out - I didn't do the facing for the waist until I tried them on. I'll explain why later.
The first step was to sew darts into the back pant leg. Here I drew the dart onto the fabric with dissapearing ink.
Now I serged the edges of each piece.
Then I sewed the sides together on the left leg.
Now the right leg was to get an invisible zipper. First I made a few marks to match everything up. Then I pinned one side of the zipper to the pants.
The zipper is attached and it closes!
Now it was time to sew the legs together. So I put one leg inside the other with right sides facing eack other. Then I serged them front to back and also did a regular stitch on top. I don't want my pants to split open when I wear them.
Now it was time to try them on. Excuse the pink granny panties showing.
Here is why I did not cut my waist facing in the beginning - I had made the pants a size larger than I needed to accommodate my hips. The waist was too big, so I needed to see by how much I needed to add to the darts. Then subtract that from the size of the waistband facing so it would fit perfect. So now I cut may facings and interface and ironed everything together.
Then I sewed the left side together and sewed it onto the pants working from the zipper back around to the zipper.
Then I needed to sew it down around the zipper to give it a nice finish - the instructions stated to hand sew this part, but I hate to sew by hand. I put the zipper foot back on my machine and folded the piece over as in the photo below (already sewn in this photo).
I stitched the fabric next to the zipper teeth. Photo below shows the opposite side than the one above.
Then turned it right side out. Here is the outside.
Here is the inside. Nice smooth finish. I just wish I has serged the edge of the facing before I sewed it in.
I ran a stitch along the top to keep the fold in place. Last step was to hem the legs.
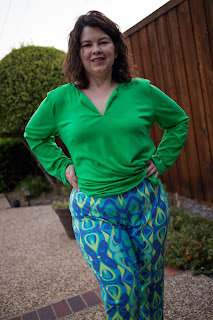
Here I am in my pants. I also made a Piper Boho Tunic (also from Wardrobe by me) to go with my pants. You can see my post about the Piper here.
I think I'll make me a few pairs of these for this fall and winter in stretch denim and some stretch corduroy. I'm actually pretty impressed with how well they ended up fitting me. And, they were surprisingly easy to make.


No comments:
Post a Comment