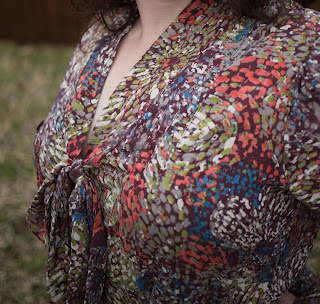
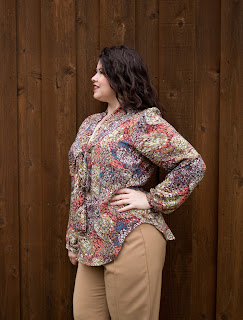
This time I was testing the Zamora Blouse. It is a loose fit blouse with a tie neckline. It's best made in a lightweight woven with a lot of drape. I used a woven of unknown content that was lightweight and very fluid. It was something I found at Golden D'or during one of their inventory sales for $1/yard.
The Zamora Blouse, and all Itch to Stitch Patterns are 20% from March 7 - March 13. So this is a great opportunity to grab some others.
Here are all my pieces cut out.
First I had to iron on some fusible interfacing.
Then I marked the lines for the intricate front release tucks.
Then I ironed them one by one.
As I ironed them in place, I edge stitched the fold of each tuck. The give the neckline a beautiful detail.
Now I made marks for the bust darts. I found that cutting the dart out, then running my disappearing ink along the cust out was the easiest way for me to mark the dart.
Then I sewed the dart and ironed it down.
I then marked the waist darts on the front of the shirt. I used the same technique I used for the bust darts.
Waist darts sewn and ironed.
Now to iron 1/4" on the edge of the placket.
Then it was folded to the front and stitched
The plackets were then turned right side out and ironed.
The top of the back has a small pleat at the neck.
Now I sewed the front pieces to the back piece.
Now to make the tie. The 2 pieces are sewn together. And the entire length is sewn in half right sides together.
Then the edges are sewn together, except where marked in the middle.
It's then turned right side out, and the fabric is clipped to the seam on one side. The clipped side stays up, and the unclipped side has the seam allowance ironed down. So the piece looks like this in the middle where the opening is left.
Then the tie is sewn onto the neckline. This is the trickiest part. You line up the opening of the seam of the tie so that it goes off of the front pieces, like I have shown here. You only sew the side that was clipped. The side that has the seam allowance ironed down stays unsewn - for now.
After it is sewn on as shown above, the other side of the tie is brought down on the inside of the top so that the folded edge just covers the seam. I then edge stitched the tie covering the seam.


Thank you! Those are really helpful pictures and such a lovely blouse!
ReplyDelete