There have been a lot of new custom groups start the past few months. One of those is Starfluffle. Their first round had a cute hedge hog print - if he could have passed for a prairie dog, I would have bought it.
Starfluffle prints on 95% cotton/5% lycra and the weight is 220gsm. I was very impressed with the fabric right out of the package. The print quality was very good - nice sharp images that seem to float on the background. It washed up well with hardly any color on the color catcher and it shrank very little. The fabric has a nice smooth texture and has a great weight. It was so easy to cut and sew with - it had virtually no rolling.
I was selected to sew a strike off for their current round which is all nautical themed prints. I was sent a piece of the "Tidal Treasure" print. This print is just gorgeous with cool tones of blue, green, and purple shells on a calming sea of blue. It also coordinates with the other 2 nautical prints that are offered. You can pre-order this print and others at http://starflufflefabrics.bigcartel.com/products. Be sure to also check out their Facebook page.
These prints will be great for Spring and Summer outfits. Since it was nautical, I immediately thought of a boat neck top. I used the recently released Wardrobe Builder Tee from Wardrobe by Me. It has so many options and a boat neck is one. I did my own color blocking. The pattern is on sale for $7 - get it before the sale is over.
Konstant Krafters Fabric
I'm new to Konstant Krafters Fabric, but I had been in the Facebook group for awhile admiring their prints. I was given the opportunity to sew up 2 strike offs.
Both prints are open for preorder from February 6th - February 15th.
Angel Wings is a striking print of what looks like overlapping angel wings. The colors are beautiful and range from a bright pink to a dark blue. It could coordinate with almost any shade of blue, purple, or pink.
For this print I made the Greenstyle Creations Laurel Tunic.
The other print I received was Blue Soft Feathers. This one was my favorite. The background of this print is a very soft blue and the feathers are just gorgeous with many cool toned colors. I had such a hard time deciding on a coordinate. I thought about using green, purple, blue, and brown. In the end I decided on a bluish purple.
I made the Filles a Maman Extraordinary Girl (Women's version) for this fabric.
Both prints are open for preorder from February 6th - February 15th.
Angel Wings is a striking print of what looks like overlapping angel wings. The colors are beautiful and range from a bright pink to a dark blue. It could coordinate with almost any shade of blue, purple, or pink.
For this print I made the Greenstyle Creations Laurel Tunic.
The other print I received was Blue Soft Feathers. This one was my favorite. The background of this print is a very soft blue and the feathers are just gorgeous with many cool toned colors. I had such a hard time deciding on a coordinate. I thought about using green, purple, blue, and brown. In the end I decided on a bluish purple.
I made the Filles a Maman Extraordinary Girl (Women's version) for this fabric.
Sugar Ink Forget Me Not SUAT Merryweather
I recently sewed up a strike off from Sugar Ink Fabric of "Forget Me Not". It's a beautiful lace design that is done in soft shades of grey, purple, blue, and a little yellow. Christie Vanavi-Lin prints her designs on organic cotton lycra in Europe, but has strike offs printed at Spoonflower. My strike off came to me directly from Spoonflower and was printed on their new cotton lycra fabric. Christie also prints on performance knit, PUL, french terry, poplin, and minky. The preorder for this fabric closes on February 7th.
I decided to make the Stitch Upon a Time Merryweather with the turtle neck collar. I've made a regular merryweather with a regular banded neck, but wanted to do a different variation this time.
Here are all my pieces cut out.
First sew the bodice top to the bottom.
I then topstitched the seam with my coverstitch.
Then the front and back together at the shoulders.
Now to pin the sleeve on. I start at the middle.
Here is the sleeve pinned in place. Yes I know I am using wonder clips, but it sounds funny to say I clamped it in place.
Then the sleeve is attached by serging the sleeves on.
Both sleeves are sewn on.
Then I put the shirt with right sides together and serged the side seams.
I like to add cuffs to my sleeves. Here I am making the cuffs.
Cuffs are serged on.
Now to make the turtle neck collar. First the piece is ironed in half. The short ends are serged.
Then the collar is turned right side out and the short ends are topstitched. I did these on the sewing machine since both sides will be visible, The piece is then assembled as shown below. It is basted so the pieces overlap by 3/4".
The collar is pinned on.
Then serged on.
Then the bottom of the top was ironed to make a 1" hem. I then hemmed it with my coverstitch.
Here I am in my Merryweather. I think I should have made the collar open on the right instead of the left since I part my hair on the right side.
I decided to make the Stitch Upon a Time Merryweather with the turtle neck collar. I've made a regular merryweather with a regular banded neck, but wanted to do a different variation this time.
Here are all my pieces cut out.
First sew the bodice top to the bottom.
I then topstitched the seam with my coverstitch.
Then the front and back together at the shoulders.
Now to pin the sleeve on. I start at the middle.
Here is the sleeve pinned in place. Yes I know I am using wonder clips, but it sounds funny to say I clamped it in place.
Then the sleeve is attached by serging the sleeves on.
Both sleeves are sewn on.
Then I put the shirt with right sides together and serged the side seams.
I like to add cuffs to my sleeves. Here I am making the cuffs.
Cuffs are serged on.
Now to make the turtle neck collar. First the piece is ironed in half. The short ends are serged.
Then the collar is turned right side out and the short ends are topstitched. I did these on the sewing machine since both sides will be visible, The piece is then assembled as shown below. It is basted so the pieces overlap by 3/4".
The collar is pinned on.
Then serged on.
Then the bottom of the top was ironed to make a 1" hem. I then hemmed it with my coverstitch.
Here I am in my Merryweather. I think I should have made the collar open on the right instead of the left since I part my hair on the right side.
Wardrobe by Me Wardrobe Builder Tee
I love all of the patterns I have tested for Christina Albeck of Wardrobe by Me, but this one is such a staple. A tee with so many variations in neckline, side ruching, straight or curved hem, two lengths, many sleeve lengths - it's over 100 variations you can make! What's best is the tee is very easy and quick to sew. You can make one in a hour - easily. That includes putting the pattern together and cutting fabric.
The pattern is on sale for $7 for one week only - ends next Friday. Buy it HERE. There is also a giveaway to win a free copy. Enter HERE!
The first one I made was a v-neck with ruching on one side and the regular length. I made it using a remnant I bought at Wherehouse Fabric in Dallas for $2.50.
The neck one I made was the scoop neck, long length with side ruching. This fabric came from Jo-Ann's and was on the markdown rack for $3/yard.
The last one I made was scoop neck, long length with curved hem. I made it with a light weight ITY knit that I got at Wherehouse Fabrics for $2.50.
I love all 3 and will definitely make a few more in a shorter sleeve length when spring and summer come around.
The pattern is on sale for $7 for one week only - ends next Friday. Buy it HERE. There is also a giveaway to win a free copy. Enter HERE!
The first one I made was a v-neck with ruching on one side and the regular length. I made it using a remnant I bought at Wherehouse Fabric in Dallas for $2.50.
The neck one I made was the scoop neck, long length with side ruching. This fabric came from Jo-Ann's and was on the markdown rack for $3/yard.
The last one I made was scoop neck, long length with curved hem. I made it with a light weight ITY knit that I got at Wherehouse Fabrics for $2.50.
I love all 3 and will definitely make a few more in a shorter sleeve length when spring and summer come around.
Duck Butt Designs - WHiPP
I recently tested a pattern for Duck Butt Designs (DBD). This was my first time testing for Katie Wilson, but not my first time sewing a DBD pattern. I've made several of the DBD Treasure Pocket Tee's. See post HERE for the blog on it.
This pattern is the Women's Hourglass Panel Pullover (WHiPP). Use the code WHIPITGOOD for 25% off through Wednesday (01/27). Buy it HERE.
I also recommend joining the Duck Butt Designs Sew and Chat on Facebook. They have sew-a-longs and some free patterns. Plus - you will hear about sales and upcoming new patterns.
It was so much fun testing for Katie - AND I inspired a pattern mod. A friend at work had asked me to "fix" a shirt that was too small - and she needed it the next day. Katie had just posted the pattern in the tester group and I thought -it's perfect. The pattern called for a straight hem, but I kept the original curved hem of the shirt.
Here is the shirt that was too small.
So here are all my pieces cut out.
I sewed the side panels to the front panel.
Topstitched all me seams with my coverstitch.
Then I made the yoke.
I sewed the sleeves to the yoke. Then sewed the body to the yoke.
Here is the now bigger concert tee. It turned out super cute!
Back side.
I thought it turned out so good and the fit was good (my friend is a little thinner than me). I was hesitant to post in the tester group - since I kinda went off on my own and didn't follow the pattern. But I loved it and it looked great - so I posted it. And thankfully Katie loved it and decided it needed to be a mod.
But now it was time to make the real deal. Here are all my pieces.
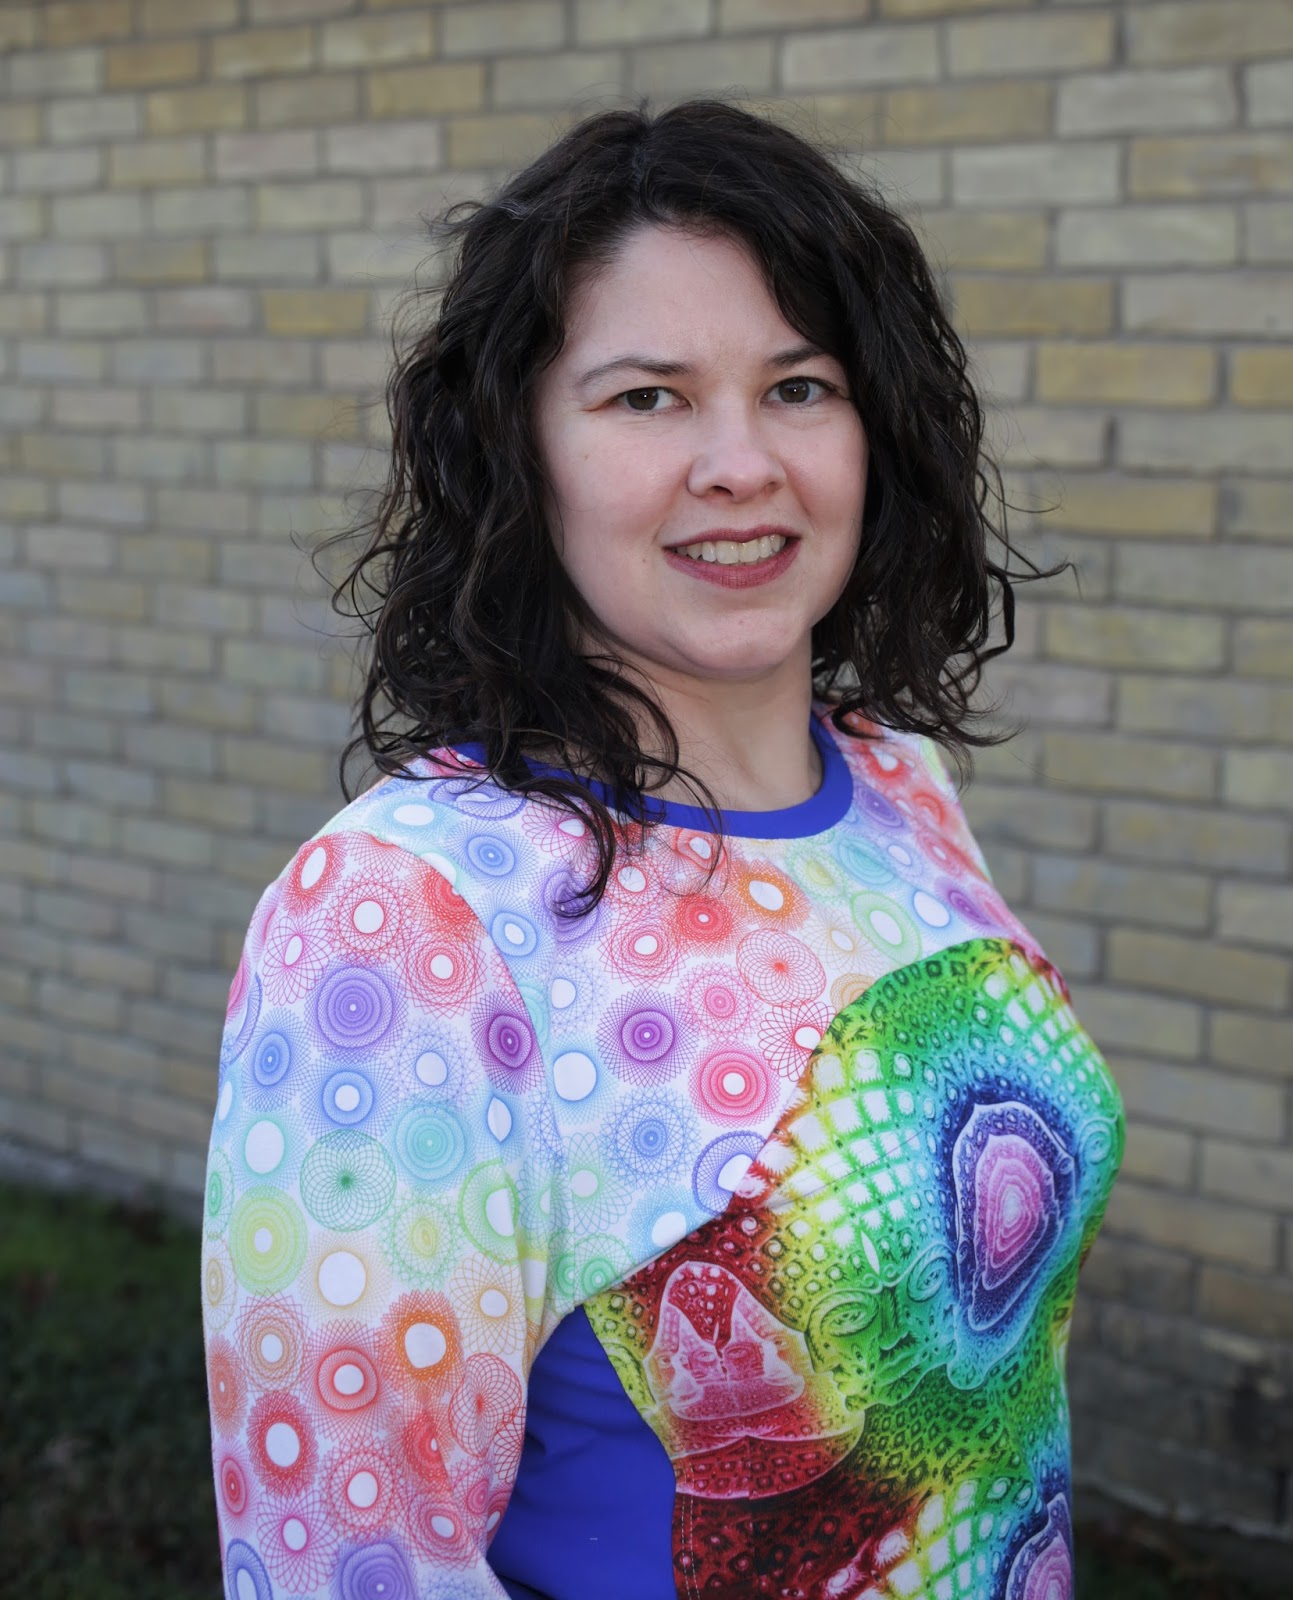
I love this Alex Grey print from Pink Zeppelin. I've been hoarding a yard for something special, and bought a flawed remnant not too long ago. So I decided to use my flawed piece for this top.
The Alex Grey print is so bold - I needed something to go with it that was equally vivid. So I chose this Spirograph print from MK Designs. Isn't it so cool?
I also needed a solid to tone things down and ground it all - so I used this bright blue supplex from Zenith & Quasar. Here is my front panel sewn together with the side panels.
Topstitching thanks to my coverstitch.
Adding the back panel.
Back side with coverstitching.
The yoke.
Time to add the sleeves.
One sleeve down - one to go.
Now to stitch the side seams of the sleeves and the yoke (pattern directions have changes and not done this way).
Look at my perfect seam!
Yoke is done. Then I added the body - but my photos of that magically disappeared (or I forgot to take them).
Here I am in my "wild" WHiPP -
Then I made another. This time with a curved hem and a cowl. I love cowl necks. This one is a little long on me and really needed a belt to make it look great on me. Otherwise - I looked a little slouchy.
And that crazy fabric you see - It's from KNITorious and called marbelized.
I love this top! And it's actually a pretty quick sew. What's best is I can use a fat half for the front and back panels. And it has the option of side pockets, a hood, and pieced sleeves.
This pattern is the Women's Hourglass Panel Pullover (WHiPP). Use the code WHIPITGOOD for 25% off through Wednesday (01/27). Buy it HERE.
I also recommend joining the Duck Butt Designs Sew and Chat on Facebook. They have sew-a-longs and some free patterns. Plus - you will hear about sales and upcoming new patterns.
It was so much fun testing for Katie - AND I inspired a pattern mod. A friend at work had asked me to "fix" a shirt that was too small - and she needed it the next day. Katie had just posted the pattern in the tester group and I thought -it's perfect. The pattern called for a straight hem, but I kept the original curved hem of the shirt.
Here is the shirt that was too small.
So here are all my pieces cut out.
I sewed the side panels to the front panel.
Topstitched all me seams with my coverstitch.
Then I made the yoke.
I sewed the sleeves to the yoke. Then sewed the body to the yoke.
Here is the now bigger concert tee. It turned out super cute!
Back side.
But now it was time to make the real deal. Here are all my pieces.
I love this Alex Grey print from Pink Zeppelin. I've been hoarding a yard for something special, and bought a flawed remnant not too long ago. So I decided to use my flawed piece for this top.
The Alex Grey print is so bold - I needed something to go with it that was equally vivid. So I chose this Spirograph print from MK Designs. Isn't it so cool?
I also needed a solid to tone things down and ground it all - so I used this bright blue supplex from Zenith & Quasar. Here is my front panel sewn together with the side panels.
Topstitching thanks to my coverstitch.
Adding the back panel.
Back side with coverstitching.
The yoke.
Time to add the sleeves.
One sleeve down - one to go.
Now to stitch the side seams of the sleeves and the yoke (pattern directions have changes and not done this way).
Look at my perfect seam!
Yoke is done. Then I added the body - but my photos of that magically disappeared (or I forgot to take them).
Here I am in my "wild" WHiPP -
Then I made another. This time with a curved hem and a cowl. I love cowl necks. This one is a little long on me and really needed a belt to make it look great on me. Otherwise - I looked a little slouchy.
Subscribe to:
Posts (Atom)
-
Join EYMM and 24 fellow bloggers as we celebrate the first 24 months of our pattern shop with a huge sale and giveaway! We will be ...
-
Make sure to visit the other stops on the tour to see more versions and hoodie inspiration! Many are giving away a copy of the pattern! (...
-
Today is day six in the Blossom and Grow Blog Hop hosted by Maureen Fiorellini for the release of her Blossom and Grow Collection by Studi...