Showing posts with label sale. Show all posts

Sofiona Designs 3rd Anniversary Sale

My selfish apparel sewing has been very little the past 18 months. The  Pandemic has really changed how I work, dress, and what I do. I haven't worked in the office since March 2020. I've resorted to wearing mostly athlesiure wear. I would say athletic wear, but really I'm not all that athletic. I do more than work in my athlesiure wear - I do get in exercise throughout the day. It's been great and I've been able to lose some weight and inches. So when I was contacted by Sofiona Designs to see if I was interested in sewing a few of their patterns I said yes! I have been in need of better fitting clothes. I don't mind wearing baggy clothes, but I thought it would be nice to have just a few new pieces that were in my new size. 

I knew I wanted to make the  Miss Trail Joggers. I wanted a top to wear with them and decided the Miss Birch Sweater would be a great top that would be casual enough for my walks in the neighborhood, but still nice enough to wear with some nicer pants or jeans to work. I also thought a new pair of leggings may not be a bad idea either and picked out the Miss Tamarack Tights.


The Miss Birch is a super comfortable top. I am 5ft tall and did not make any height adjustments for the top. I would say it runs a little short and would advise to lengthen it if you are of average height. I made the size 8 based on my bust measurement.  My hips are a few sizes bigger and I probably should have sized up the bottom band so it was not as tight. The print is a cotton jersey and the black is a thermal (waffle) knit. The cotton jersey is not especially stretchy.  Overall the fit is good and  I would make minimal adjustments when making it again. 


The Miss Trail Joggers have a design that I have only seen on tights before. I made a size 16 based on what I think my hips are (I think I need a sewing friend to help me measure)  and my thigh measurement. I did size down the waist a tad, and used a smaller elastic for the waistband. I took out 2" from the length for my height. This seemed almost perfect. I would probably add back a half inch when making them again as I like my ankles covered when seated.


For my Miss Trail Joggers I used a textured athletic knit from Zenith & Quasar. It has a bit of an optical illusion effect as it looks black at an angle and teal when viewed straight on. 


The pockets on the Miss Trail Joggers are nice and large. However they are placed very forward on the leg and feels a bit awkward when I put my phone in the pocket. The pockets are not bagged and I attached them using a reverse coverstitch. I then did a reverse coverstitch on the other seams to give them a sporty look. 


The back pieces have shaping over the rear. I have an ample bum and found that I could have used an extra half inch added to the rise as the waistband dips a little bit at the back center seam. You can see it peeking out from under my top. 


The Miss Tamarak Tights have some fun colorblocking options, but I wanted to keep them simple and solid. I have found that I wear my solid colored leggings way more than my color blocked ones. Colorblocking is so fun, but I have a hard time picking out colors that look great together. 


I decided a while back to keep my wardrobe to a few main colors and doing so has really made getting dressed easier and less stressful. My two main colors are green and blue and I pull in pops of purple and yellow. These purple tights were really needed in my closet. I love the dark and rich color. These are made with an athletic knit from Zenith & Quasar


Here's a look at the simple color blocking I did from the pattern. I did a reverse coverstitch on the seams for a sporty look. 


Here's another view of the colorblocked design. I didn't wear my shoes in these photos because I realized after the first few photos that my shoes had gotten muddy on my walk to this spot. 


Sofiona Designs is celebrating their 3rd year anniversary. All patterns are on sale for 40% off. These are the only patterns I have tried from Sofiona, but they have many more. The drafting seems to be spot on and the  instructions were clear. I was able to get all three items made over 2 days. I cut them all out on one day and sewed all three up the next day - with time to spare. 

Follow me on Instagram and Facebook!

Disclosure: This post may contain affiliate links. These links provide me with a small compensation if you make a purchase using my link. There is not cost to you when you do this. My thoughts and opinions given in this blog post are mine.

Ellie & Mac Sweetie Pie Tunic & Dress

It's Wacky Wednesday at Ellie & Mac! This week I am making a new to me pattern - the Sweetie Pie Tunic & Dress. I decided to make the Tunic version and need to make a few more. I love the fullness of the Sweetie Pie. Isn't it a cutie pie?


You definitely want to use a fabric with a lot of drape to prevent it from tenting out. I used a lightweight poly spandex jersey knit I got from a local sewist destashing. I normally don't do florals, but loved the muted colors and abstract design of the flowers.


I find this shape very figure flattering and have already spied a few knits in my stash that I will be turning into Sweetie Pie Tunics for this fall.


Another pattern in this weeks Wacky Wednesday Sale is the Lucky Girl Top & Dress. Here's a photo of my favorite one. I wear this one quite often.


Be sure to check out all the patterns on sale for Wacky Wednesday!

Follow me on Instagram and Facebook!

Disclosure: This post may contain affiliate links. These links provide me with a small compensation if you make a purchase using my link. There is not cost to you when you do this. My thoughts and opinions given in this blog post are mine.

Nature's Fabrics Rainbow Sale

Nature's Fabrics is having a sale on all rainbow fabrics! They are currently 15% off through December 21st. When I saw this Rainbow Tie Dye, I knew I needed it to make my mother a top. Good thing she and I are close to the same size - I got to wear it first.


The Rainbow Tie Dye is a lightweight polyester jersey. It is 180 gsm which is perfect for a flowy top.


I made the Love Notions Tidal Top with my Rainbow Tie Dye fabric.


I had the strawberry cotton rib knit from Nature's Fabric that matched the Rainbow Tie Dye perfectly. I used it not only for the neckband, but to also do a small band on the sleeves and to add a piping detail to the front bodice seams.


The Tidal Top has a center back seam which allows you to adjust the pattern for a sway back - which I have. I did my best to stripe match as perfectly as possible.


I probably could have scooped out another 0.5" for my swayback, but it's pretty darn close.


This is the first time I have added a piping detail to the Tidal Top and I really love it. I had to do some pattern finagling to get the stripes to match up on that front bodice seam.


The piping was also done to break up the stripes just enough that you don't notice where they don't match up perfectly. Think of it as an optical illusion.


 I'm wearing my mother's Tidal Top with Greenstyle Creations Chelsea Pants.


I can't wait to give my mom this top. I think she's going to love the Rainbow Tie Dye so much. She loves when I make her tops - especially with tie-dye prints.


Here's a closer look at the Rainbow Tie Dye fabric. Each stripe is two tones and each color is separated by a grey stripe.


Rainbow Fabrics are on sale for 15% off at Nature's Fabrics through December 21st. See all the fabrics on sale HERE!

Follow me on Instagram and Facebook!

Disclosure: This post may contain affiliate links. These links provide me with a small compensation if you make a purchase using my link. There is not cost to you when you do this. My thoughts and opinions given in this blog post are mine.

George +Ginger Ginger Dress Hack - Shirt Length

Remember my George + Ginger Ginger Dress that I posted recently? Well, I said in my blog that I had a shirt hack, this is it! You can read the original blog post HERE!

When the Ginger Dress was being updated, I was a very naughty tester. Instead of sewing up my tester version first, I sewed up a hack instead.  The lengthen/shorten lines on the Ginger Dress are a bit different than most patterns as you have to take length off going both ways. I decided to see what would happen if I just cut my pattern at the shorten line and do nothing else. Here's a crappy webcam shot I took of it on without the band added. It's super cute just like this!


So, I didn't want to leave the Ginger Dress like that, and felt like it would have been too short hemmed - but maybe not. So I went ahead and added the bands. I think it's still super cute like this as well, but feel like it's more of a tunic length.


Either way, I think it's cute with my skinny jeans and I've worn it a few times already.  I'm thinking about making another Ginger Dress and maybe doing the bands about half the height they are or even leaving it off.


So, if dresses are not your "thing" either, this is a cute option to try.


Today is the last day of the Anniversary Sale. Get 25% off all patterns with the code YEARTHREE.

Follow me on Instagram and Facebook!

Disclosure: This post may contain affiliate links. These links provide me with a small compensation if you make a purchase using my link. There is not cost to you when you do this. My thoughts and opinions given in this blog post are mine.

Nature's Fabrics Bamboo Spandex French Terry

Nature's Fabrics has to have the largest selection of Bamboo fabrics that I have ever seen. I recently got a sample of the Bamboo French Terry and I love it! I need a whole winter wardrobe made from it.


This is seriously the softest french terry I have ever felt.


I just love this green color, but I'm not positive which it might be. You can see all the colors available HERE. Nature's Fabrics has all their Bamboo fabrics on sale this week and they will also be on sale for Black Friday.


I had a hard time deciding what to make with the Bamboo French Terry because I had so many ideas! I wanted to make a cardigan or joggers, but had so many other ideas too.


Then my thoughts came to this top that I keep seeing advertised on Facebook by shops like Wish & Zulily.


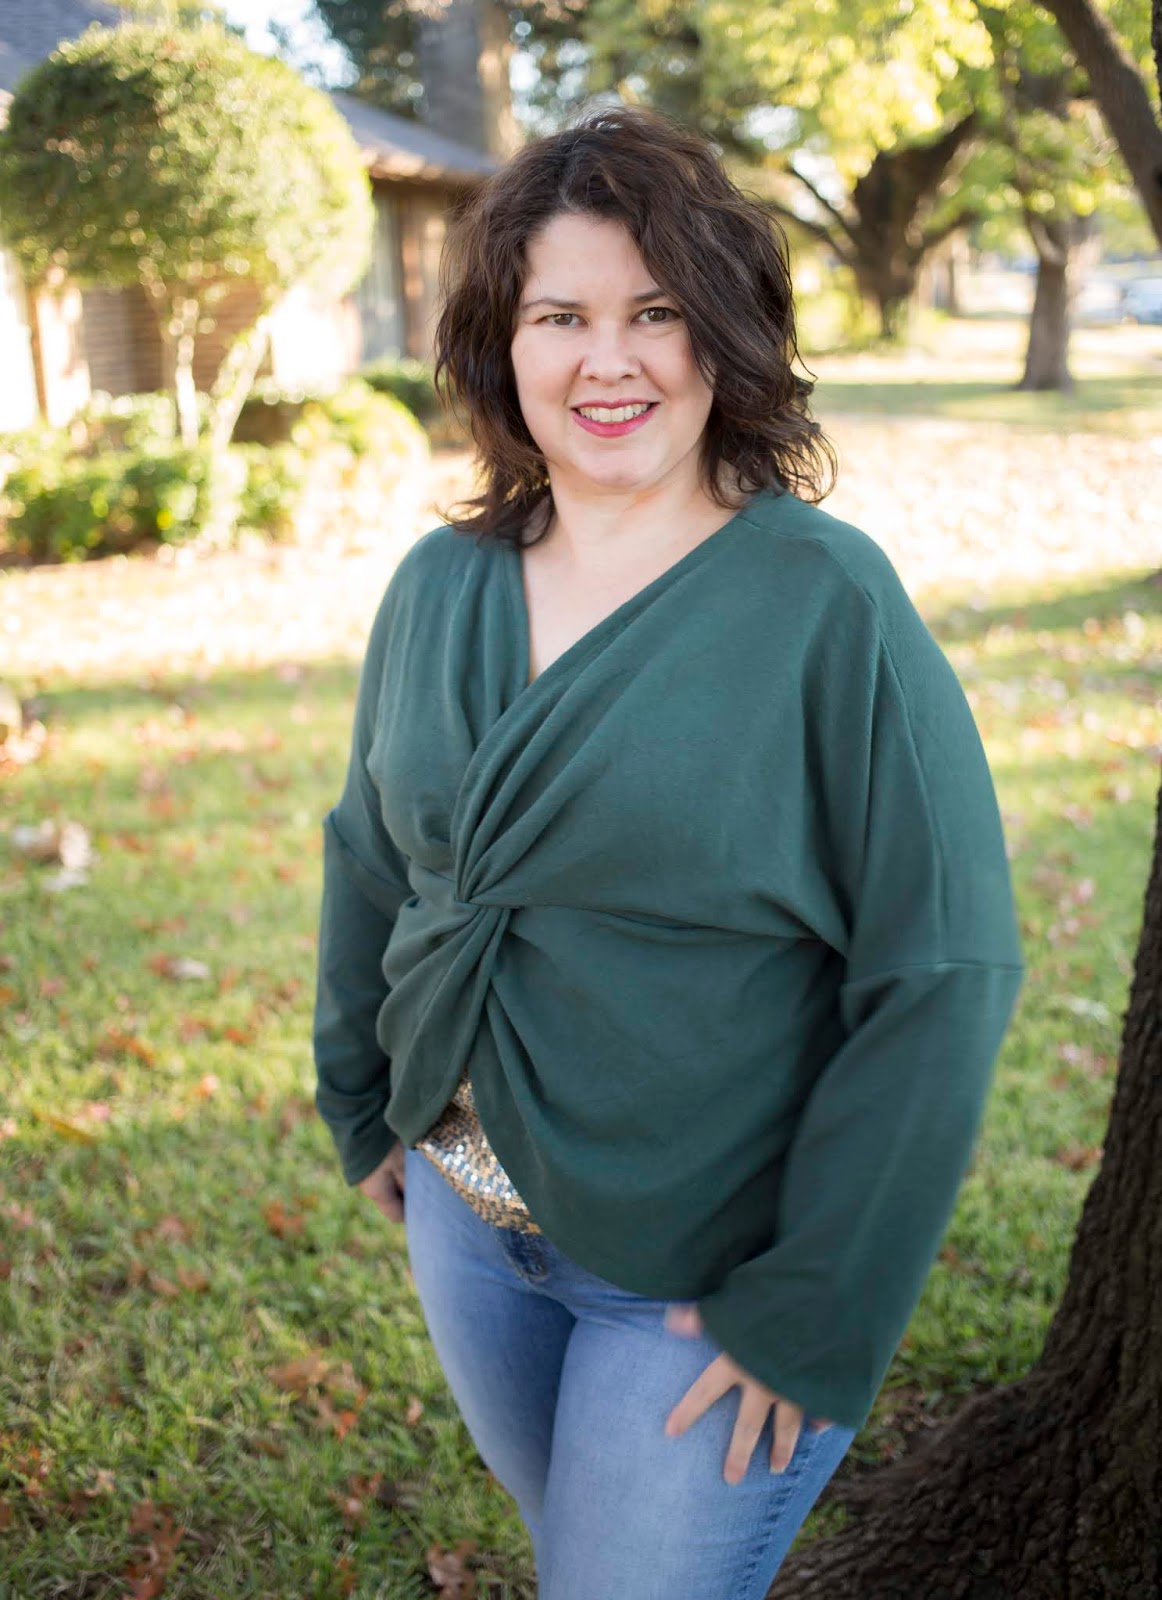
So, I set off to make my own version using the Designer Stitch Gemma sewing pattern as my base.  The Gemma is a twist top that has two variations - twist front or twist back. I blogged about the Gemma Twist front a few months ago. You can read it HERE.


I used the Gemma Twist Back version to recreate my inspiration. I made a few slight modifications to make it wearable with the twist in the front. Before I cut my pattern out, I traced the back neckline of the twist front version onto the front piece of the twist back version. I then cut the neckline somewhere between the two as I thought I still might want to wear this top with the twist in the back one day.


The Gemma does not include long sleeves. These sleeves were some that I drafted - but it's super easy. You want to add the sleeves before sewing the side seams. Simply measure the distance of the end of the pattern sleeve, then measure roughly how long you want your sleeves. Then draw out the pattern piece using these measurements. Taper the rectangle to be slimmer at the wrist.


My sleeves could have been made a little slimmer and a little shorter. But I think I did a pretty good job copying my inspiration.


I somehow only managed to get one photo of the back.


Nature's Fabrics is have a huge Bamboo sale right now and will have another great sale on Black Friday. Shop now before things sell out, and go back for Black Friday for some extra savings.

If you haven't tried the bamboo french terry, please give it a try. You'll ever want any ordinary french terry again. https://www.naturesfabrics.com/

Follow me on Instagram and Facebook!

Disclosure: This post may contain affiliate links. These links provide me with a small compensation if you make a purchase using my link. There is not cost to you when you do this. My thoughts and opinions given in this blog post are mine.

Ellie and Mac Women's Shark Bite Top

I love Wacky Wednesdays at Ellie and Mac! There is always a great selection of patterns that are marked down to only $1 for Wednesday only. This week, the Women's Shark Bite Top is part of the Wacky Wednesday Sale!

The Shark Bite Top is awesome! I love the hemline - it adds interest and a bit of flair!


I made this one with an ITY (interlock twist yarn) knit that I got from Wherehouse Fabrics.


I'm 5' tall and made the pattern as drafted. This length is great on me for wearing the Shark Bite Top with leggings or with my Designer Stitch Shakti pants in these photos. As you can see below - it covers my behind. If you are taller than me and you want the same coverage, you might need to lengthen the pattern a little bit.


I love the loose fit of the Shark Bite Top. I've been having issues with autoimmune gastritis that causes my upper abdomen to swell a lot. The fit of the Shark Bite Top helps to disguise this issue. In the photo below, my stomach is swollen and sticks out past my bust, but you can't really tell that in this top.


This top comes with a couple of options. I made the non-colorblocked version. I'm anxious to try the colorblocked version. I've seen some really cute version  of the Shark Bite Top that have a solid body and print colorblocked sides.


The Shark Bite Top can be made sleeveless, short sleeves, or with 3/4 length sleeves. I've made a ton of sleeveless shirts recently, so I decided to make this top short sleeved. I love the length of these sleeves.


The Shark Bite Top takes 2 yards of fabric to make a version like mine in size large. The colorblocked version is great for using about 1 yard of 2 different fabrics.


If the Shark Bite Top isn't your style, be sure to check out all the other patterns for $1 in the Wacky Wednesday Sale.

Follow me on Instagram and Facebook!

Disclosure: This post may contain affiliate links. These links provide me with a small compensation if you make a purchase using my link. There is not cost to you when you do this. My thoughts and opinions given in this blog post are mine.

Itch to Stitch Chirripo Top

Kennis at Itch to Stitch always has amazing patterns. I am in love with the newest pattern - the Chirripo Top.  The Chirripo Top is a loose fit top that has 2 options - sleeveless or with flutter sleeves. I chose to make the sleeveless and was thrilled that I found I was able to make my size (I'm a size 10 A cup in this pattern) with just 1 yard of 60" wide woven fabric.


The details in this top are beautifully made and the finishing touches in the sewing construction give you a garment that looks professionally made. The square neck yoke is a welcome addition to my closet full of round neck tops.


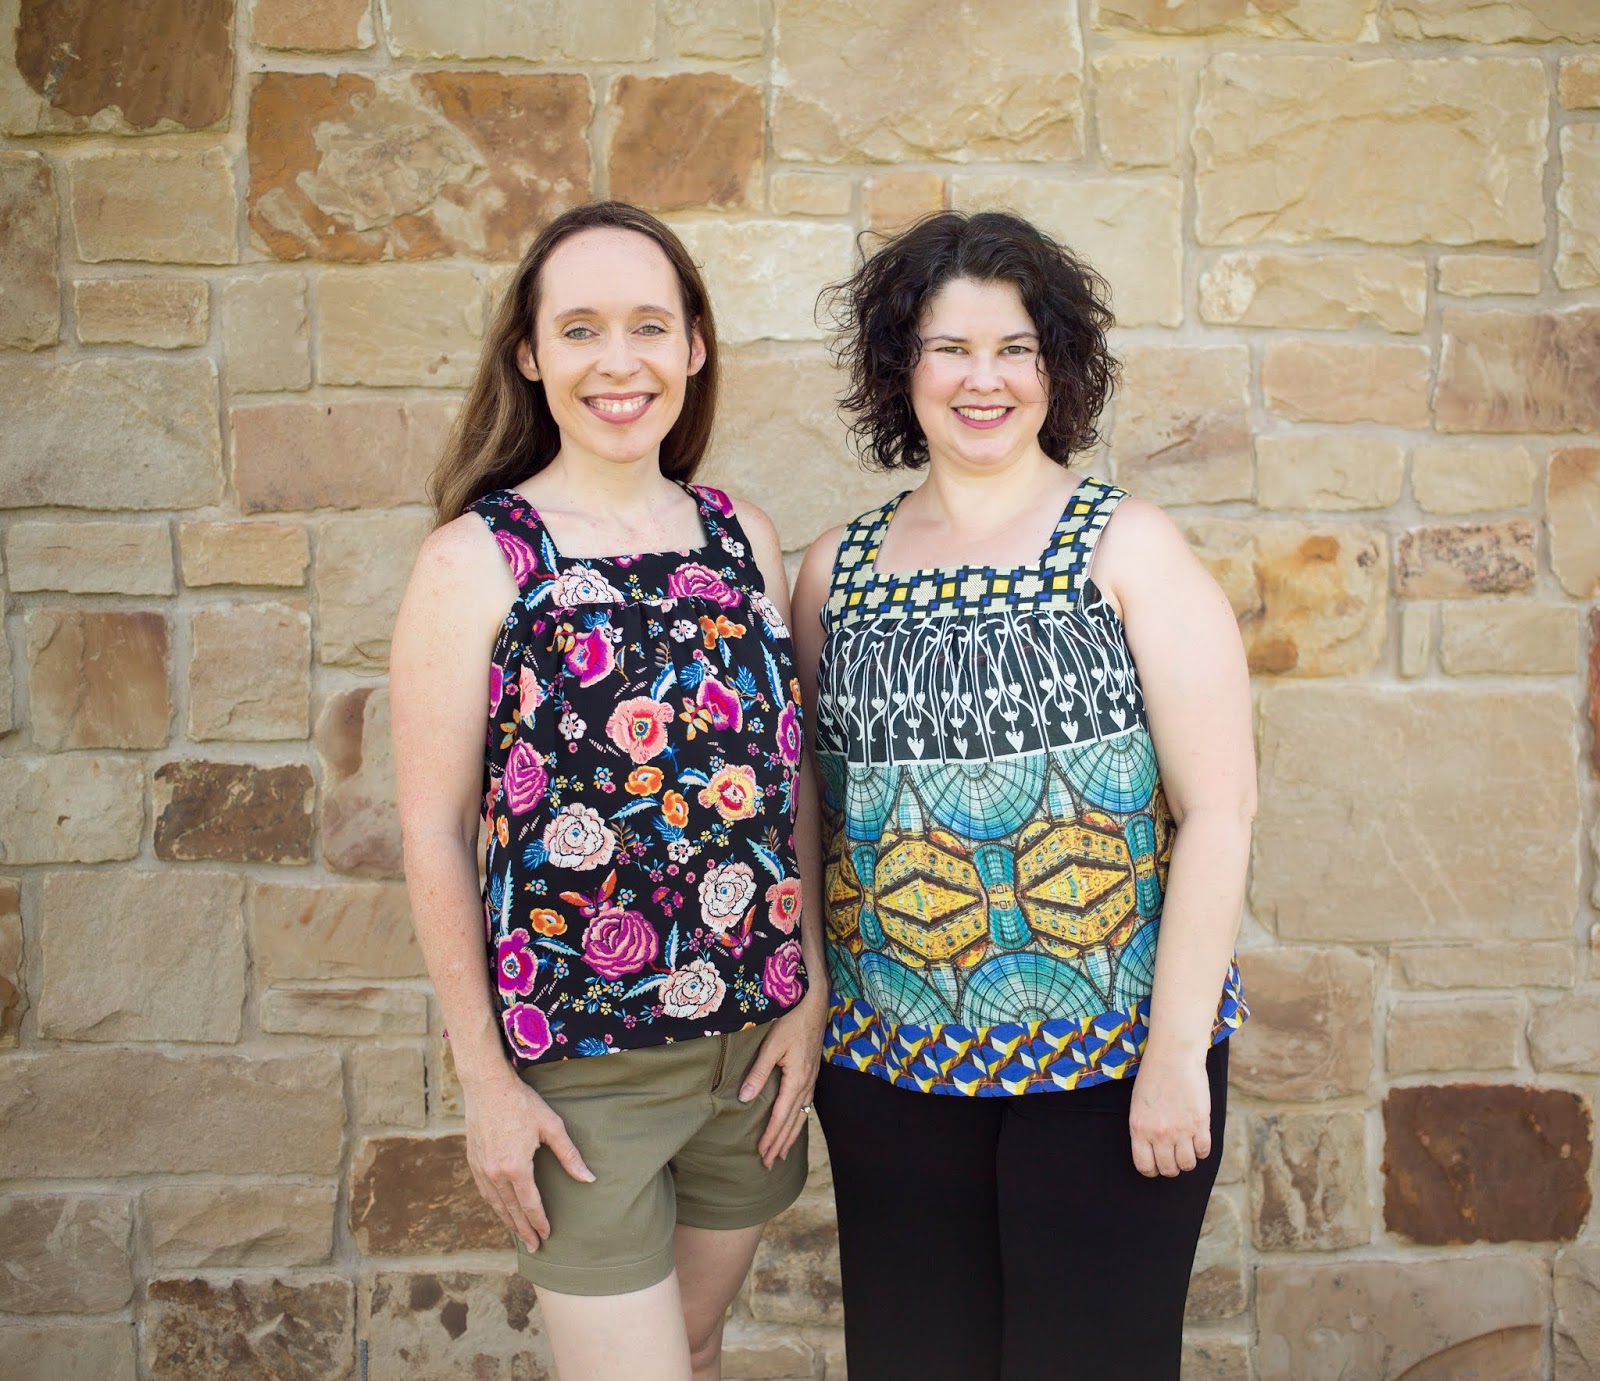
My friend Sharon was also a tester for the Chirripo and we met up for photos. I was taking the two photos above when she arrived to the nature preserve where we decided to meet for photos. As usual, when she arrived we began chatting about all the things that had been happening in our lives and I completely forgot that I needed to take photos of this top. I did snag several good ones of Sharon and I together.


The Chirripo is made for wovens. In particular soft drapey wovens. Sharon's Chirripo is made with a crepe (not sure if it's a rayon or poly blend). My Chirripo is made with a cotton voile. My cotton voile is soft, but probably not quite as drapey as needed. But I absolutely love how it turned out in this double border print.


You might notice in these photos that my Chirripo is a little longer than Sharon's. This is because - I made it longer - but not intentionally. My double border print did not have an even amount of border at both ends. I was doing my best to line up the design on my pattern pieces and intentionally left the extra at the bottom with the intent to cut it off before I hemmed. I then decided to keep as much of the print on the very bottom as possible and decided to only trim the back which was longer.


Since Sharon and I had found this noce shady spot on this 100 degree day, we stayed put and took photos of our second Chirripos we made. I did not realize it at the time, but in the time it took us to change tops, the sun had risen just enough to cause a bit of a sun flare in these photos. Let's just act like this was done for artistic purposes.


We both used a poly blend woven for these versions. They were light and drapey. Be sure to read Sharon's blog post at Sweet Mama Life!


The Chirripo can easily be dressed up or down. I'm wearing mine with knit slacks. I'm most likely to wear these pants with my Chirripo to work with a jacket or cardigan. While Sharon paired her Chirripo with some cute shorts and sandals for a casual but chic outfit.


I did manage to get a few photos of just me in my Orange Chirripo!


Here's a look at the back. It has the same square yoke in the back as the front. The back is just higher.


I love the way this top feels. It's so soft and silky. But this fabric was such a pain to cut! It kept shifting around. The yokes and side pieces gave me the most trouble and I think I cut out 6 yokes before I decided to just line the yoke with a cotton woven.


I love the side panel detail! It's so cool and gives the top a great shape on the sides.


The front gathers are very light - it's not heavily gathered. I gathered using my serger and had to ease them out as it had gathered them too much. But I did end up with beautifully even gathers.


The Chirripo is on sale for one week for $8! I'm eager to make one with a flutter sleeve. I'm also toying around the idea of making one with a cotton woven yoke and side panels, but a knit body.

Follow me on Instagram and Facebook!

Disclosure: This post may contain affiliate links. These links provide me with a small compensation if you make a purchase using my link. There is not cost to you when you do this. My thoughts and opinions given in this blog post are mine.