Showing posts with label quilt. Show all posts

Minerva Core Range Plush Faux Fur Quilted Blanket

I have a faux fur blanket that I bought at a store many years ago. My family loves it and my son regularly steals it from my bed in the winter. When I saw this Minerva Core Range Plush Faux Fur, it reminded me of that blanket and I thought I would try to make my own version. 


This faux fur is very plush and heavy. It is so silky soft. It did not shed much as I quilted it. After quilting I did run it through the dryer with cool air to fluff it up.


To make this blanket I used a 108" wide quilt back that I loaded onto my longarm frame. The backing I used is a 108" wide brown agate print from Jo-Ann. They call it brown, but it's more of a Plum in my opinion. I then added a layer of cotton batting. I probably could have skipped the batting or used flannel, but I was going for maximum warmth and coziness. 


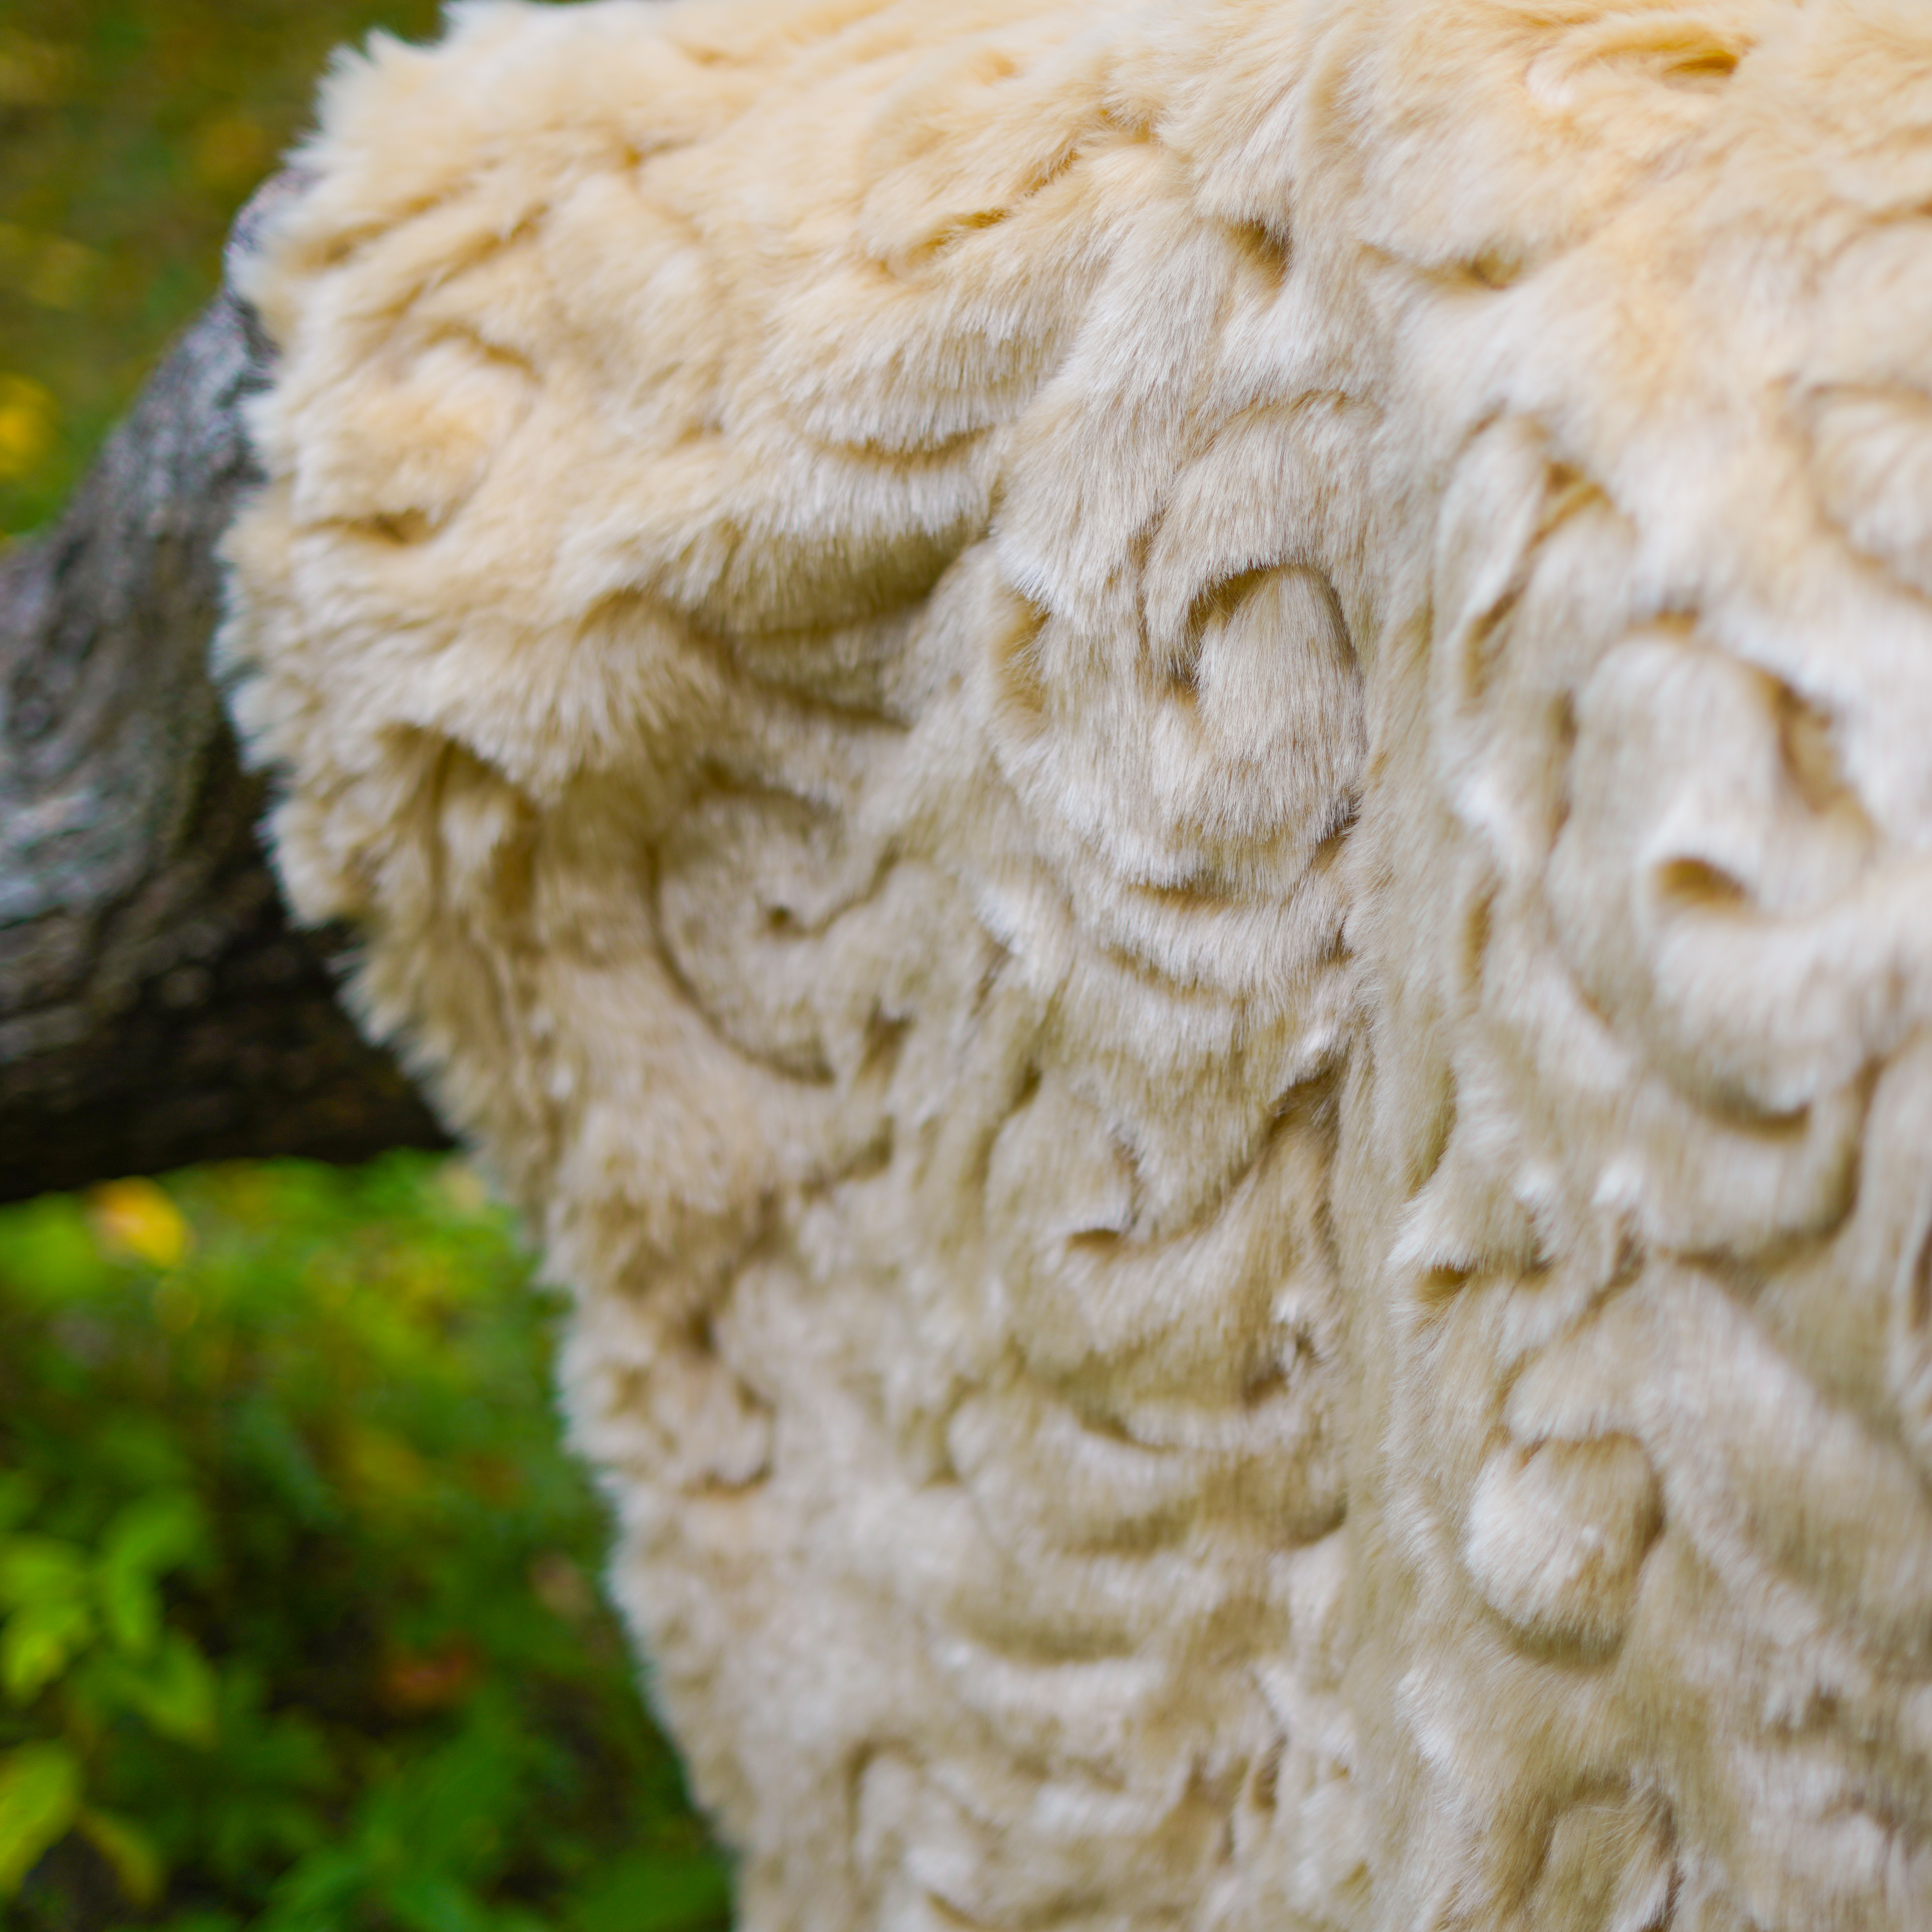
Then I "floated" the fur on top and just had to pick out my quilting pantograph. I did not want to do very dense quilting, but I also wanted the quilting to add some visual interest. I decided to go with a floral meander that I scaled up to be large. 


After it was quilted, I carefully cut off the excess batting and backing while I held the fur to the side. It was impossible to avoid cutting some fur and that was the messy part. I then serged the sides to give them a clean finish. 


I then added a binding. I can't wait for the cooler weather to arrive so I can snuggle under this blanket. Garfield and the other cats are already enjoying it.


Follow me on Instagram and Facebook!


Hearth + Home Quilt Pattern by The Seasoned Homemaker

I recently tested the Hearth + Home Pattern for The Seasoned Homemaker. This pattern is 2 quilts in one. Both quilts are made using the same blocks and layout, there's just a variation in the fabric placement of the 9 patch blocks. I tested the Home version which is described as having a vintage feel and made a scrappy version. The Hearth version has a star like design with more negative space.


This has been a record setting summer in Dallas, Texas. The nonstop 100+ degree days have had me longing for the cooler temps of autumn. I have made a lot of brightly colored quilts this year and thought it would be nice to make one with a fall inspired color palette. 


I had fun digging through my fabric bins for fat quarters and remnants in shades of teal, gold, and maroon (I really wanted purple like eggplant, but couldn't find enough fabrics in this color in my scraps). I found so many fun prints and blenders and it was fun to mix and match them into the 9 patch squares. For the snowball blocks, I went to my cart of precut scraps and pulled out the colors I needed in the size needed for these blocks. It was such a timesaver having my scraps precut into common sized squares and strips.


For the background fabric and borders I went through my remnants that are less than a yard in size. I used two different shades of brown for the background fabric. For the borders I used two fabric leftover from projects I sewed for Jaftex. 


My quilt features scraps from  previous projects, random fat quarters and scraps that I've acquired from swaps and secondhand. In addition to the two different quilts that can be made from the pattern, there will also be a tutorial that provides instructions to make blocks and a small quilt with the trimmings of the snowball blocks. 


I loved how quick and easy the Hearth + Home Pattern was. I give it bonus points for being scrap friendly. I really want to make the Hearth version as well - and also make it scrappy.  Below is a graphic of both versions.

There's a discount code available when you sign up for emails from The Seasoned Homemaker.


Follow me on Instagram and Facebook!


Coral Shadow Quilt Pattern by Sew Beachy Quilts

I recently tested a quilt pattern for Sew Beachy Quilts. The pattern is the Coral Shadow Quilt Pattern. The pattern is beginner friendly and is a block based pattern. 


When I visited my mom a few months ago, she insisted that I take home some of the fabric she had been stashing for a long time. In her stash I found several yards of this colorful tropical print "Rainbow Jungle"  by Alexander Henry that was dated 2003. The print is large and I loved the colors and patterns of the tropical leaves. Since the Coral Shadow Quilt Patter includes large squares for a focal fabric, I decided to use the Rainbow Jungle fabric and then found complimentary solids and a batik for the rest of the fabric needed for the pattern. 


The Coral Shadow Quilt Patter uses strip piecing which makes the construction of the blocks go very quickly. The arrangement of the blocks creates a visually interesting pattern that makes the quilt look more complicated than it is. 


The Coral Shadow Quilt Pattern includes three sizes. I made the Throw sizes which finishes at 68" by 82".  The size could be adjusted slightly be leaving off the borders or even making the borders a different size. 


The Coral Shadow Quilt Patter is perfect for highlighting a large scale print. I think it would be fun to make a scrappy version of this quilt. 


Follow me on Instagram and Facebook!


Big Sky Star Quilt

The Big Sky Star quilt pattern by Plains and Pine has been on my Quilt "Bucket List" since I saw it. I bought the pattern (and the matching sticker - it's on my pattern cabinet) while back. 


When I received the Froth and Bubble Collection by One Sister Designs for Henry Glass Fabrics as my January Ambassador project for Jaftex, I knew it would be perfect for the Big Sky Star quilt pattern. The colors reminded me of the cover quilt on the pattern. 


The Big Sky Star pattern cover quilt is a scrappy version of the pattern. The Froth & Bubble collection was huge! It contains 28 SKUs and I received 25 of them. 


I knew the only way to really show off that many different fabrics in one project was going to be making a scrappy something. I could have split the fabrics into two separate projects, but I don't have that much free time to try to attempt two complete quilts in less than a month. 


The Froth and Bubble Collection has so many different prints and colors. Some really didn't feel like they went with the rest of the collection. There's one purple print and it felt like an outlier, but I worked it into my quilt and it looks beautiful.  


What does Froth & Bubble mean? I have no idea! Some of the prints have words on them and I wasn't very fond of these. I prefer prints without words written on them unless the  words really add to the design. 


This quilt pattern was fairly easy to follow, but not so easy to actually make. I redid many pieces over and over, and left many seams that are "off". I figure if you can't spot it easily from 10 feet, then it's all good. 


Plus, I find that once you quilt it and wash it, it hides all those sewing sins. 


I quilted this on my Tin Lizzie and used the free "Wild Cherries" pantograph from Urban Elementz.  I scaled the design a bit big as I like something that quilts fast and isn't too dense. I feel like quilting that has a looser spacing gives the quilt more drape


I definitely learned a lot making this Big Sky Star quilt that I'll take into consideration when I make it again. I found that I liked the fabrics arranged in a certain way for the scrappy layout and will be more mindful of layout next time. 

Follow me on Instagram and Facebook!

Disclosure: This post may contain affiliate links. These links provide me with a small compensation if you make a purchase using my link. There is not cost to you when you do this. My thoughts and opinions given in this blog post are mine.

Diagonal Dazzle Quilt Pattern by Mix Measure Make

I recently finished testing the Diagonal Dazzle Quilt by Danielle of Mix Measure Make. I'm not going to lie - this quilt took me a long time to make, but it was so worth it. Just look at all those tiny squares! They are 1" finished and there are hundreds of them to make.  I also decided to make a scrappy version of the quilt. The quilt requires three colors plus a background fabric. 


I was given  a large amount of fabric scraps from a member of our local sewing group on Facebook. She  had an etsy shop at one time and cut her items in batches from the fabric folded in half which left a long strip down the middle of the yardage that was about 10" wide. One fabric that was in large abundance was a white fabric with a black space print. I decided to use it as my background. I probably have enough of this fabric for 2 more quilts. 


I then needed to pick my colors. This took me a bit and after playing with fabrics for a day I decided on a royal blue, a turquoise/mint green, and purple. 


I was particular with which fabrics I selected for my blue and turquoise/mint colors. For blue, I tried to stay as close as possible as I could to a royal blue and included blues with  green in the print. For the Turquoise/mint colors I kept to a few fabrics which some all came from  the same collection. I did allow them to range from a pale mint with a white print to a dark turquoise. I find that adding in different tones in  the same color family adds depth and interest.


When it came to the color purple, I had to dig to find enough fabric scraps that were even close to being purple-ish. I added  in some more pinkish purples and some prints that were equal parts blue and purple. I also had a print that  was purple based, but had bits of red and brown in the print. 


I absolutely love how my Diagonal Dazzle Quilt turned out! As my scraps were cut into the quilt pieces, I was extremely worried that my quilt was going to turn out hideous. As I slowly pieced together the units, I really loved how the colors played together and embraced the variety of the purples. All my fears evaporated when I took my completed top outside to get a photo and loved how bright and playful it turned out. 


The Diagonal Dazzle Quilt comes with two different sets of instructions. There's one set that I followed that uses less fabric. It uses zero waste techniques such as 4 at a time flying geese and making 2 half square triangles at a time. This method does require trimming pieces and blocks as you go. The second method creates two quilts! It uses more fabric and uses zero waste techniques, but you make flying geese and half square triangle individually, but sew a second line of stitches to make a bonus half square triangle. After you make the Diagonal Dazzle Quilt like mine above, you can them make a second smaller quilt with the bonus blocks. 

This is Danielle's first quilt pattern and I was so impressed with the instructions and all the sewing tips and tricks in the pattern. It's on sale for a limited time for the release. 

Follow me on Instagram and Facebook!

Disclosure: This post may contain affiliate links. These links provide me with a small compensation if you make a purchase using my link. There is not cost to you when you do this. My thoughts and opinions given in this blog post are mine.

Hamilton Transparency Quilt by S-Renee Designs

I recently tested the Hamilton Transparency Quilt pattern by S-Renee Designs. I really love the look of the blocks and signed up to test just the block. At the time of the test I was getting ready to head to my mom's for a week and wasn't sure how much sewing I'd get done at her house. On the bright side, since I was going to visit my mom, my mother in law lives in the same area and I was able to put the block on a back of a knit jacket for her. 


The construction of the block is not overly complicated, but it is an intermediate skill level. The pattern includes instruction to make the construction of the blocks "zero waste". As an environmental scientist - that is something I really appreciate. The blocks finish at 22" and nearly filled the back of a ladies 3X knit jacket. 


I used some of my bonus blocks to make a decorative detail on the front of the jacket as well. 


I thought it turned out pretty cute. I'm really loving all the ready to wear clothing that has quilt inspired designs added as accents recently. I love making t-shorts with quilt blocks, and doing a jacket was so fun.


There were some really gorgeous Hamilton Transparency Quilts made made other pattern testers and they have inspired me to make a throw version. Hopefully I can get to it soon. 


Follow me on Instagram and Facebook!

Disclosure: This post may contain affiliate links. These links provide me with a small compensation if you make a purchase using my link. There is not cost to you when you do this. My thoughts and opinions given in this blog post are mine.

Chantli Quilt Pattern by Jess Poemape

Earlier this year I was a "mentor" for the Chantli Quilt pattern by Jess Poemape. A mentor looks over the instructions and checks out the quilt math and provides feedback. I did this while I was recovering from my gallbladder surgery back in July. I was something creative I could do while I wasn't quite feeling well enough to sew. 


As I worked through the math and instructions I really loved the simplicity of the pattern - it's almost all strips of the same width just cut to different lengths, but how they are arranged really gives a complicated look.  I love it when a quilt looks harder to make than it really is. I also kept thinking about how great it could be for scraps and jelly rolls. I had been cutting fabrics to make my Deltille Quilt at the time and put all my scraps aside knowing they would make a great Chantli Quilt.


The pattern was inspired by the traditional log cabin block. A traditional log cabin block always starts with a red square to signify the home. I've included one small red square in my quilt as a nod to the log cabin block. Home in Nahuatl (a language of the Aztec and Toltec people) is Chantli - hence the name of the pattern. Jess Poemape is a Latina quilt pattern designer and wants to spread knowledge about her ancestral heritage. As a fellow Latina - I fully support her mission. 


I used some Art Gallery Lower the Volume cotton poplin in Simple Growth for my background. I had some of this fabric leftover from a project for Minerva. I was able to get all my pieces cut for the blocks, and for part of the sashing, and then ran out. I had to order more from  the Fat Quarter Shop. There is a very slight color difference between the two, but I don't think it's that noticeable.


The Chantli Quilt was really fun to put together. I will definitely be making another - most likely with scraps as I really love how it looks. 


Be sure to check out other Chantli Quilts on Instagram by looking at the #chantliquilt hashtag and give Jess Poemape a follow. She makes gorgeous quilts and is a fantastic longarm quilter. 


Follow me on Instagram and Facebook!

Disclosure: This post may contain affiliate links. These links provide me with a small compensation if you make a purchase using my link. There is not cost to you when you do this. My thoughts and opinions given in this blog post are mine.

Week ending October 24, 2021 in my Sewing Room

I didn't do much this week.  I was so busy with work and didn't have much free time when I got off. 

On Monday I got mail from Minerva. They sent me fabric and a pattern to sew up.  I'm making view A of this new look pattern. The fabric is a cotton voile. 


I started a quilt pattern test for Frannie B Quilt Co. It took me forever to decide on fabric and this is what I settled on.  I decided to use some vintage ditsy floral prints and my scrappy background is 5 or 6 low volume light colored prints. 

I had a tumble Wednesday on my lunchtime walk and really bruised up my right hand. It hurt and was swollen,  so I took two days off from sewing to let it heal. 

I got out my Sew Easy ruler/cutter since my hand was tender and couldn't handle using the rotary cutter. I bought this at a garage sale about 5 years ago and this was my first time using it. I love it! I'll definitely be using all the time now. 

Friday evening I got my star block made for the Stargazing Quilt Pattern that I'm testing for Frannie B Quilt Co. I signed up for the block test, but I'm hoping to make the throw size quilt. 

Saturday I went through a few bins in the garage. We are planning on moving some shelves around and switching everything to smaller storage containers.  Before we do, we are going through everything to see what needs to go, and what we need to keep. I was excited to get to the storage bin with my grandmother's quilts. This is the quilt she made and gave to me for my graduation and wedding. 

Here's the note she wrote on the back. She left her signature and date on all her quilts and often left a little note about the quilt. 

I also have this Indian girl quilt that she made. I'm not sure why or how I ended up with this quilt. 

I also have this patriotic quilt top she made and hemmed to use as a table cloth. She gave it to me when she came to my house one year for a fourth of July cookout. We have used it a few times. I am thinking of turning it into a quilt. Or I might back it with something so the fabric doesn't continue to fray with use. 

I took my Deltille Quilt (Pattern by Running Stitch Quilts out for a photoshoot now that it's completely finished! Here she is in all her glory. I have a short blog post about it and the backing on Minerva.com 


I ended the weekend getting ally pieces cut out for my Stargazing Quilt.  

This week I'm hoping to do some work on a t-shirt quilt and on my Stargazing Quilt. I have plans for the Halloween weekend that will keep me busy and not much time for sewing. I'm already counting down the days to the next Holiday - Veteran's Day - and having some time off then.